Webpack v2 Quick Start

With Webpack 2.x out of the release client phase, we're here with a quick start guide to get your development project running. This guide will guide you through a minimal setup where you will configure webpack and it's webpack-dev-sever. The configuration will also process your CSS and transpile ES6 code. The only prerequisites are that you have Node installed (You can download it here) and that you have your favorite terminal and editor apps handy. Let's get started!
To see the final product, checkout this github repository: https://github.com/bendyworks/tic-tac-toe-webpack
Project initialization
To start off create a directory for the project, run npm init and install webpack. The init command will create a package.json file with the project name set to the name of the directory (demo in our case). The --save-dev option in the install command will list webpack as a development dependency inside package.json. Go ahead and run each of the following commands in succession:
mkdir demo && cd demo
npm init -y
npm install --save-dev webpack
If you'll be commiting this project to a git repostitory, consider creating a basic .gitignore file to prevent you from unintentionally commiting unnecessary files. At a minimum, you'll want to exclude the node_modules directory. You could also ignore the build/ directory:
echo "node_modules/" > .gitignore
Next we'll create a few initial files and an app directory:
mkdir app
touch app/index.js index.html webpack.config.js
Paste the following markup into index.html:
<!DOCTYPE html>
<html lang="en">
<head>
  <meta charset="UTF-8">
  <title>Webpack Demo</title>
</head>
<body>
  <h1>Demo</h1>
  <script src="build/bundle.js"></script>
</body>
</html>
The one item of note in the markup above is the script tag. You may have noticed that we haven't created any such file. This is because we'll be configuring Webpack to bundle all of our code and create that file.
Paste the following code into app/index.js. Upon execution, it'll append a new DIV tag to the HTML document.
var element = document.createElement('div');
element.innerHTML = "Welcome to the Bendywork's webpack demo!";
document.body.appendChild(element);
And finally, paste the following configuration into webpack.config.js:
var path = require('path');

module.exports = {
  entry: './app/index.js',
  output: {
    filename: 'bundle.js',
    path: path.resolve(__dirname, 'build'),
    publicPath: "build/"
  }
};
In the configuration above, entry identifies what file is going to be serving as the main JavaScript code. This entry point, and all of it's dependencies, will be bundled into the file specified by the output section.
We can now trigger a webpack build using the following:
./node_modules/.bin/webpack
This will automatically pickup our webpack configuration and is the same as calling ./node_modules/.bin/webpack --config webpack.config.js. If the build is successful, you'll see ./build/bundle.js.
That's it! You now have a minimally configured webpack installation. You can use ES6 style import/export statements and Webpack will manage your code dependencies and bundle them together.
Development Server
Wait! You're still here? Since you're still reading, I suppose you want to do more than just bundle together your source code.
Our next step is to install webpack's dev server:
npm install --save-dev webpack-dev-server
The webpack-dev-server package is a preconfigured development server that utilizes Express and webpack-dev-middleware. This provides you with the ability to preview your project in a browser while your code live-reloads in the background. One caveat though: this should be used during development only.
To use the development server to open the page, execute the following:
./node_modules/.bin/webpack-dev-server --open
NPM Scripts
Now, remembering all of these webpack commands can get unwieldly. That's where NPM scripts come in to simplify things for us. Add the scripts lines below to your package.json file.
{
  "name": "demo_test",
  "version": "1.0.0",
  ...
  "scripts": {
    "build": "webpack",
    "watch": "webpack --watch",
    "serve": "webpack-dev-server --open"
  }
}
To trigger a one-off build of your project, you can execute this:
npm run build
To trigger a build and instruct webpack to watch for file changes, execute:
npm run watch
To trigger the development server and have your browser live-reload upon file changes, execute:
npm run serve
CSS Loading
Webpack can do more than just load and bundle our JavaScript code. Loaders, provide preprocessing functionality for various file types. Plugins are also available and provide more flexible functionality. The UglifyJS Webpack Plugin, for example, allows you to fine tune the way in which your code is compressed.
We are, however, focusing on style-loader and css-loader. style-loader will add CSS to the DOM by injecting a style tag. css-loader enables the ability to specify css imports, or dependencies, from within you application. If you were to do all of this inline, every stylesheet would be imported like this:
import css from 'style-loader!css-loader!./stylesheet.css';
By chaining the loaders together, css-loader will load your stylesheet, and style-loader will inject it into the DOM of your web page. Instead of going this route, we are going to modify webpack.config.js to use the loaders anytime a css file is imported.
First, paste the following inside ./app/style.css:
body {
  font-family: Georgia;
  color: #ffffff;
}

.carbon {
  background: linear-gradient(27deg, #151515 5px, transparent 5px) 0 5px, linear-gradient(207deg, #151515 5px, transparent 5px) 10px 0px, linear-gradient(27deg, #222 5px, transparent 5px) 0px 10px, linear-gradient(207deg, #222 5px, transparent 5px) 10px 5px, linear-gradient(90deg, #1b1b1b 10px, transparent 10px), linear-gradient(#1d1d1d 25%, #1a1a1a 25%, #1a1a1a 50%, transparent 50%, transparent 75%, #242424 75%, #242424);
  background-color: #131313;
  background-size: 20px 20px;
}
Then add the carbon class to the body tag of index.html:
<body class='carbon'>
Install the style and css loaders:
npm install --save-dev css-loader style-loader
Add the following line to the top of the ./app/index.js:
import './style.css';
Finally, add the following module rules to webpack.config.js:
module.exports = {
  ...
  module: {
    rules: [
      {
        test: /\.css$/,
        use: [
          'style-loader',
          'css-loader'
        ]
      }
    ]
  }
};
Check out the results:
npm run serve
The configuration above works, but as your project gets larger, you may begin to notice that your stylesheets don't get applied until the page finishes loading your bundle. That's because everything is being served up as a single file, and until that file downloads, none of it is available to the browser.
Webpack provides the ability to perform code-splitting. You might use this to split vendor and library code apart from your application bundle. In our case, we're going to use this feature, and a handy plugin, to extract our stylesheet and create a separate css bundle.
We'll be using the Extract Text Plugin to extract the css for bundling. One thing to note though, the usage below relies on version 2.x of this plugin. As of this writing, only v1.0.1 is available for installation through NPM. So for now, we'll install the latest release available on github:
npm install webpack-contrib/extract-text-webpack-plugin --save-dev
However, in the future you should be able to install the plugin using $ npm install extract-text-webpack-plugin --save-dev
Next, add the following link tag to the head tag inside index.html
<link rel="stylesheet" href="build/styles.css">
Now we'll start modifying the webpack.config.js file. The first step is to load the plugin. Add the following line near the top of the file (above the module.exports = { line):
const ExtractTextPlugin = require("extract-text-webpack-plugin");
After you've done that, modify the previous css rule and, instead, use the plugin to extract the css:
module: {
  rules: [
    {
      test: /\.css$/,
      use: ExtractTextPlugin.extract({
        fallback: "style-loader",
        use: "css-loader"
      })
    }
  ]
},
plugins: [
  new ExtractTextPlugin("styles.css"),
]
You can check your results again by running:
npm run serve
Shimming jQuery into the Project
Webpack understand many Javascript module formats, but sometimes you just need to add a third-party library that expects to have the global context available. To accomplish this, webpack provide the ability to 'shim' the dependency into the project. That is, webpack provides an abstraction layer so that you can export the global variables created by the library.
For our project, we're going to add jQuery:
npm install --save jquery
Now, the npm jQuery package defaults to using the minified distributable version of the library. Webpack, however, prefers to have access to the source in order to provide better optimization of your final bundled code. To accomplish this, we'll need to add an alias to the wepback config:
module.exports = {
  ...
  resolve: {
    alias: {
      jquery: "jquery/src/jquery"
    }
  }
};
We'll also want to automatically load jQuery whenever one of our source modules makes use of the $ or jQuery global variables:
var webpack = require('webpack');

module.exports = {
  ...
  plugins: [
    new webpack.ProvidePlugin({
      $: 'jquery',
      jQuery: 'jquery'
    })
  ]
};
ES6 with Babel
Our final Webpack configuration step is to install a loader for Babel. Why you might ask? It allows you to make use of newer ECMAScript language specifications in your source code. Babel then transpiles your code back into ES5, which supports a wider range of browsers.
Install babel-loader:
npm install --save-dev babel-loader babel-core
Install the babel latest preset:
npm install --save-dev babel-preset-latest
Note: as of this writing, the latest preset includes presets for 2017, 2016, and 2015
Create a .babelrc file to load the preset:
echo '{ "presets": ["latest"] }' > .babelrc
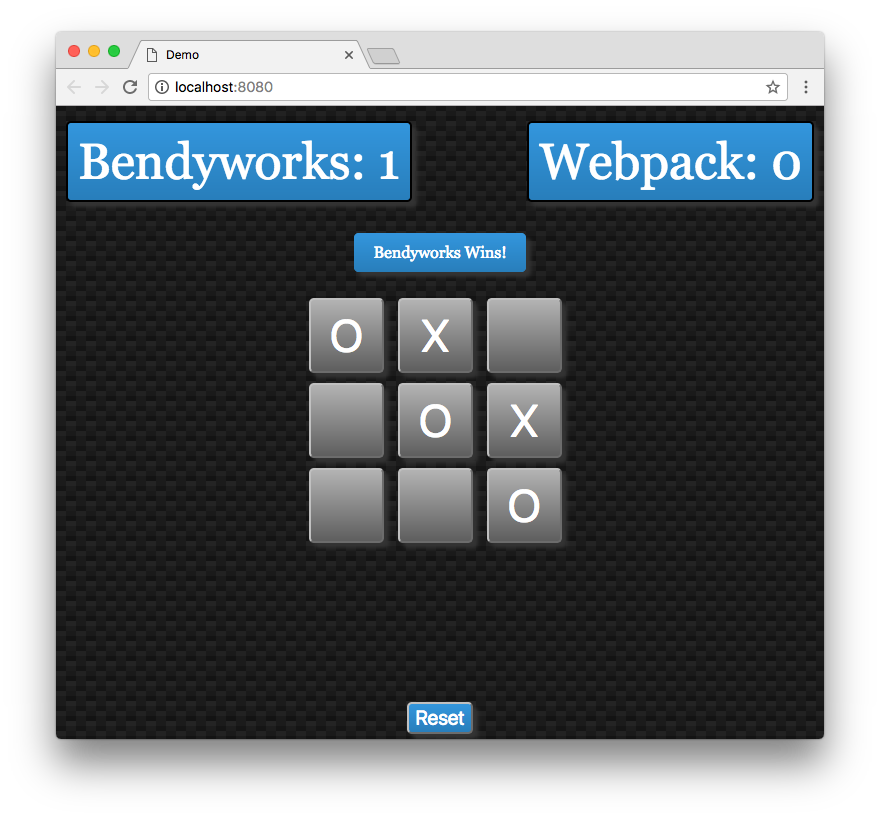
Game Time!
Now, lets do something fun and put together a simple game. For the purpose of our demonstration, we'll create a simple tic-tac-toe game.
First, install another dependency: lodash
npm install --save lodash
Add ./app/board.js
Add ./app/player.js
Replace ./app/index.js
Replace ./app/style.css
Replace ./index.html
Then serve it up:
npm run serve
For more information concerning Webpack v2, check out their guides here: https://webpack.js.org/guides/