PRPL on Rails Part 2: Optimize Rendering

This is the second of a three-part series on speeding up your Rails application using techniques from the PRPL pattern.
Performance Matters
In our previous post, we talked about improving your page load time by splitting your into code bundles and loading only what's needed for a particular route. Your performance enhancements don't have to end there. Once your code has arrived at the browser, you will want it to render as quickly as possible so that your user can start interacting with the page right away. The "R" in PRPL stands for "Render" and this post will show you how to improve your rendering speed.
Measuring Performance
There is a lot you can do to optimize rendering, so much that it can be overwhelming. We recommend that you begin by determining what's slowing your site down. Measuring your performance can help you target the big problems and avoid spending too much time on improvements that are not going to have much effect on your rendering speed.
A great first step is to run your site through a Lighthouse audit. Lighthouse will assess your site's performance and give you a list of actions that you can take to make your site faster. The easiest way to access Lighthouse is through the Chrome developer tools. Open the dev tools and click on the "Audits" tab. Click on the "Perform an audit…" button and then select "Performance" on the list of audits you can perform. After a few seconds, Lighthouse will present a report that includes your time to first meaningful paint, your time to interactive, and other useful information, as well as a list of "Opportunities" for increasing your app's speed.

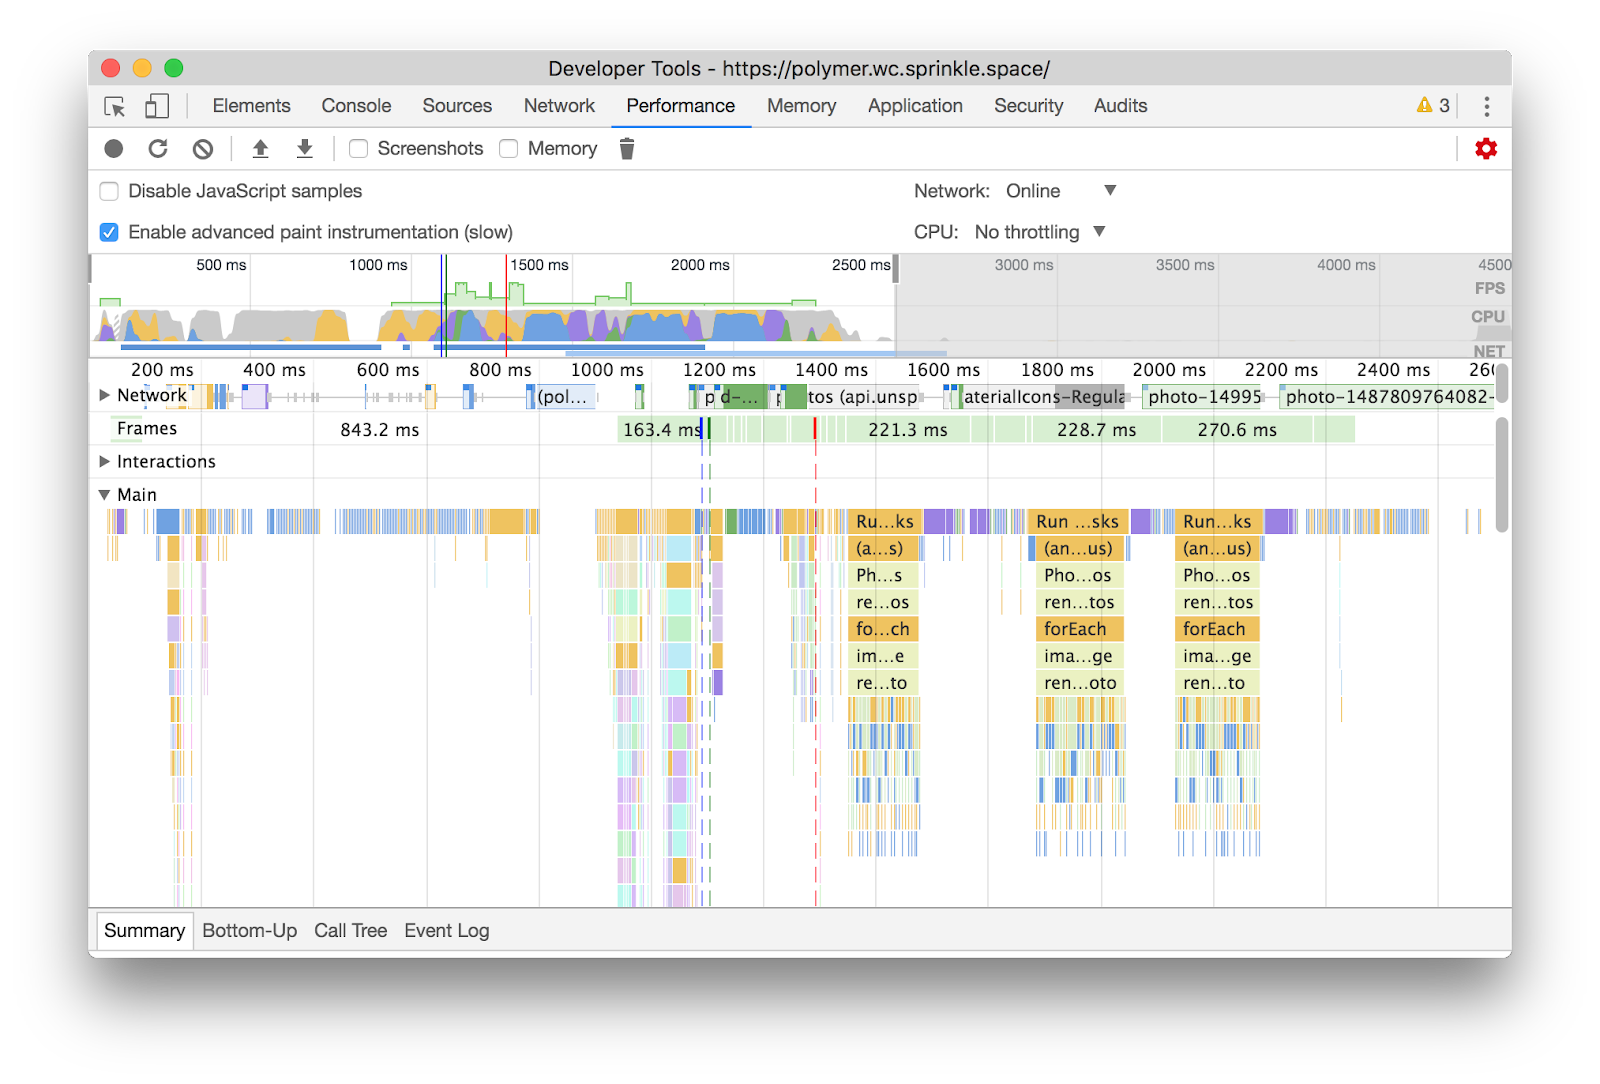
The Lighthouse report might give you everything you need, but if you want to dig deeper you can use the dev tools "Performance" panel to examine how your page loads over time. Click on the "Start profiling and reload page" icon in the upper left corner. (Detailed instructions are here.) Your page will reload and after several seconds you will see a timeline something like the one pictured below. In the "Main" section, each patch of color corresponds to an action that takes place as part of your page load. If you click on an action, you will see information about it in the "Summary" section. By doing this, you can see if HTML parsing or JavaScript evaluation or layout calculation (discussed below) or something else is slowing down your page load.
Critical Rendering Path
To make sense of the loading timeline and improve your loading performance, it is helpful to understand how the browser turns your code into the web page that your user sees. This process is called the critical rendering path.
The browser's first task in the rendering process is to construct the DOM tree. The browser parses the HTML and turns the markup into DOM nodes. If your page contains a lot of HTML, this can take a while. JavaScript also extends DOM tree construction time. When the browser finds a script tag, it fetches and executes the script before continuing. (We're over simplifying a bit. For more detail, read Ilya Grigorik's article on Analyzing Critical Rendering Path Performance.)
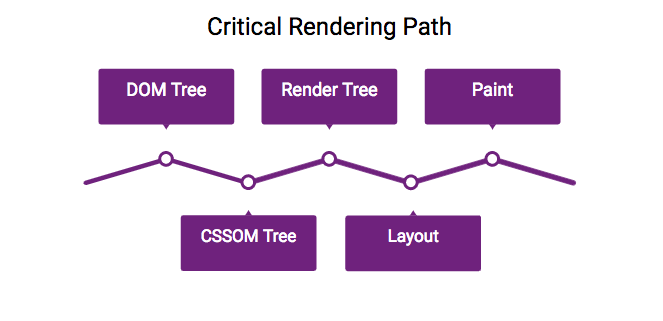
Next, the bowser constructs the CSSOM (CSS object model), which like the DOM is a a tree structure made of nodes. This phase can also take time. It is represented in the dev tools as a "Recalculate Style" event. Once the DOM and CSSOM trees are constructed, the browser combines them into a "render tree." The render tree contains only elements that are visible–no meta tags, no elements styled with display:none. Next, the browser positions the render tree in the viewport. This is phase is sometime called "layout" or "reflow". Finally, the browser paints the pixels on the screen.
Small, Lazy, and Flat
All of this has to happen before the user can see anything on the screen. In other words HTML, JavaScript, and CSS block rendering. To decrease your page load time, ship as little of each as you reasonably can.
Favor fewer elements and less complexity. Keep the size of your DOM as small as possible. Avoid deeply nested elements, which can take a long time to render. (In the exercise below, you will measure the cost of nested HTML.)
Keep critical CSS small. On your initial load, don't ship any more CSS than you need. You can reduce the size of your CSS by using media types and queries. These can prevent you from loading print styles that don't apply to your user's device or situation.
<link rel="stylesheet" media="print" href="print-styles.css" />
<link rel="stylesheet" media="screen and (min-width: 700px) and (max-width: 900px)" href="medium-width-styles.css" />
You might also be able to reduce the size of your CSS by removing any styles that aren't being used. The coverage panel in Chrome dev tells can help you identify unused CSS and JS. If your CSS file is still large, try limiting your critical CSS to styles that apply above the fold and lazy load additional page styles.
Keep your critical JavaScript small. Like your critical CSS, keep your critical JS small. If possible, load it asynchronously. Adding an "async" attribute to your script tag tells the browser that it can continue constructing the DOM while the JS is being fetched and parsed. If your JavaScript is can wait until the DOM is fully parsed, use the "defer" attribute.
Exercise Time
As you may remember from our previous post, we created a demo app and concocted some exercises as part of a RailsConf workshop that let you see these concepts in action. To download the sample app go bw.cm/prpl and click on "Setup." Then find the "Exercises" page and click on "Part 2: Rendering." The exercise asks you to use the performance timeline to look at a page before and after you add some inefficient JavaScript that hides much of the page's HTML. You can compare the performance effects of crummy JavaScript vs. lots of nested HTML. You can't always tell without measuring which issues are really going to slow you down.
Enjoy! And don't hesitate to share your thoughts or questions with us.
Resources
- Building the DOM faster: speculative parsing, async, defer and preload
- Critical Rendering Path, by Ilya Grigorik, Google Web Fundamentals
- Measuring Websites With Mobile-First Optimization Tools
- Rendering Performance, by Paul Lewis, Google Web Fundamentals
- Tips for authoring fast-loading HTML pages, MDN Web Docs
- Web Font Optimization, by Ilya Grigorik, Google Web Fundamentals
- Website Performance Optimization, Udacity Course
- What Forces Layout, Paul Irish